Designers and entrepreneurs often need mockups to present their logos, products, or brand designs in a professional and appealing way. A mockup helps give a realistic view of how a logo would look on various products or surfaces—whether on packaging, business cards, apparel, or digital screens.
If you’re using Adobe Photoshop Lite to create these professional mockups, you’re in luck! Photoshop Lite offers many tools to help even beginners achieve excellent results. This guide will walk you through the simple steps of adding your logo to mockups in Adobe Photoshop Lite.
Before We Begin: Why Use a Mockup?
Mockups help visualize your designs in real-life settings. Whether you’re showcasing your work to a client or adding portfolio pieces to your website, mockups help convey a polished and professional impression. They allow potential clients to imagine your work in real-world applications, making them an invaluable design tool.
Step-by-Step Guide to Adding a Logo on Mockups
Step 1: Choose a Mockup Template
To start, you’ll need a mockup template. Mockup templates come in various formats (PSD, PNG, etc.), but for Photoshop Lite, you’ll want to choose PSD (Photoshop Document) files. PSD files allow for easy editing using layers.
You can download free or premium mockup templates from sites like:
- Placeit
- GraphicBurger
- FreePik
- Envato Elements
Make sure the mockup has a designated smart object where your logo will be placed.
Step 2: Open Adobe Photoshop Lite
Launch Adobe Photoshop Lite on your device. If you’re new to Photoshop Lite, it’s a lighter version of the full Photoshop software, but it still retains many of the essential features you need for basic editing.
Once open, go to File > Open, and select the PSD mockup file you downloaded. The mockup will load with all its layers intact, ready for you to customize.

Step 3: Locate the Smart Object Layer
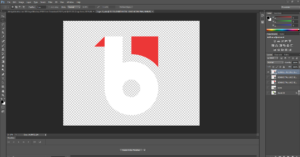
In the Layers Panel, you’ll see several layers that make up your mockup, such as background layers, lighting effects, and the object where your logo will go.
Look for the Smart Object layer. Smart Objects are special layers in Photoshop that preserve the original properties of the image when you scale or transform it. This makes them ideal for mockups because you can resize your logo without losing quality.
To locate the Smart Object:
- Find the layer in the Layers Panel usually labeled as “Your Logo Here” or something similar.
- Double-click on the Smart Object thumbnail. This will open the smart object in a new window where you can replace the placeholder with your own logo.
Step 4: Insert Your Logo
Once the Smart Object opens, you’ll see a blank area or placeholder image. Here’s where you’ll add your logo.
To add your logo:
- Go to File > Place Embedded.
- Locate your logo file (PNG, AI, EPS formats work best).
- Adjust the size and position of your logo on the new artboard. Make sure it’s aligned properly and fits well within the boundaries.
- After positioning the logo, click the checkmark at the top or press Enter to confirm the changes.
Once done, save the Smart Object by going to File > Save or pressing Ctrl + S (Cmd + S on Mac). Now, return to the original mockup file, and your logo will automatically appear in the designated space.

Step 5: Adjust Lighting and Perspective (Optional)
Many mockup templates come with pre-set lighting effects, shadows, and perspectives to make your design look more realistic. If the mockup has these layers, you can adjust them to fine-tune your design.
For example, some mockups allow you to change the lighting direction or opacity of shadows. You can also adjust the blending mode of your logo to better blend it with the surface of the object (such as a t-shirt or coffee cup).
In the Layers Panel, explore the different options such as Opacity, Fill, and Blending Modes to see what works best for your design.
Step 6: Export Your Final Mockup
Once you’re satisfied with how your logo looks, it’s time to export your final image.
Go to File > Export > Export As, and choose the desired file format (PNG, JPG, etc.). PNG is recommended if you want to retain transparency in your design, but JPG works well if the mockup has a solid background.
Choose your preferred resolution based on where you’ll be using the mockup. For example, a resolution of 72 DPI is suitable for web use, while 300 DPI is ideal for print materials.
Pro Tip: Customize the Mockup to Your Branding
You can go beyond just adding your logo. Many mockups allow you to change the background color, object color, or add textures to suit your brand’s aesthetic. Play around with the different layers in the mockup template to customize every aspect of the design.
Adding logos to mockups is a game-changer for creating professional-looking presentations. Now you can create realistic representations of your designs that will impress your clients and audience.
If you’re looking for more visual guidance, check out my YouTube video tutorial, where I walk you through these steps with live examples. You can find it here:
Watch the Full Tutorial on How to Add Logos to Mockups on Adobe Photoshop Lite
Happy designing, and remember, mockups are a fantastic way to bring your ideas to life!


One Response
“Thank you for delivering such exceptional work! Your creativity, attention to detail, and dedication truly stand out. The final result exceeded expectations and perfectly aligns with the project goals. It’s been a pleasure working with someone so professional and talented. I look forward to collaborating on future projects!”
This statement acknowledges their skills and encourages continued collaboration.